Tenant Console Admin guide
Using the tenant console
Within the platform, your organisation is represented by a ‘Tenant’. The tenant console is unique to your organisation, offering a single pane of glass for system administrators to manage devices and associated entities and associations across the estate, while ensuring segregation of data between tenants.
Signing in
The console is accessed through a subdomain specific to your organisation. It takes the form:
https://<tenant-id>.<region>.quantum.cloudWhere <tenant-id> is your organisation and the <region> is the regional instance your tenant is hosted in (uk/us). Any clarification on these details may be requested from your service provider.
Navigating to the console will present you with a sign in form which requires your username and password. If you have forgotten your password you can use the provided link to reset it.
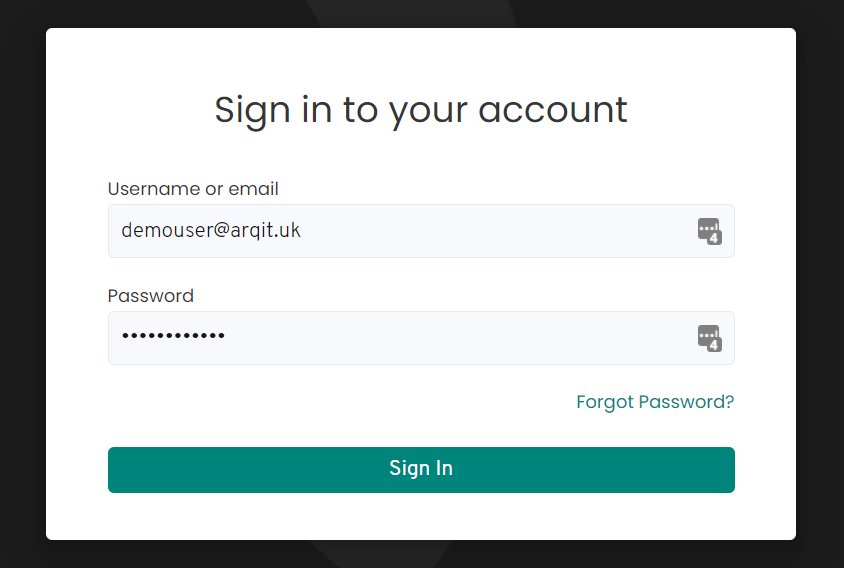
Sign in window
Dashboard
After signing in you’ll be presented with a dashboard with some statistics about the service, including the service status, the number of registered devices, and the total number of users. You can also see the last 5 events from the ’ Activity’ list.
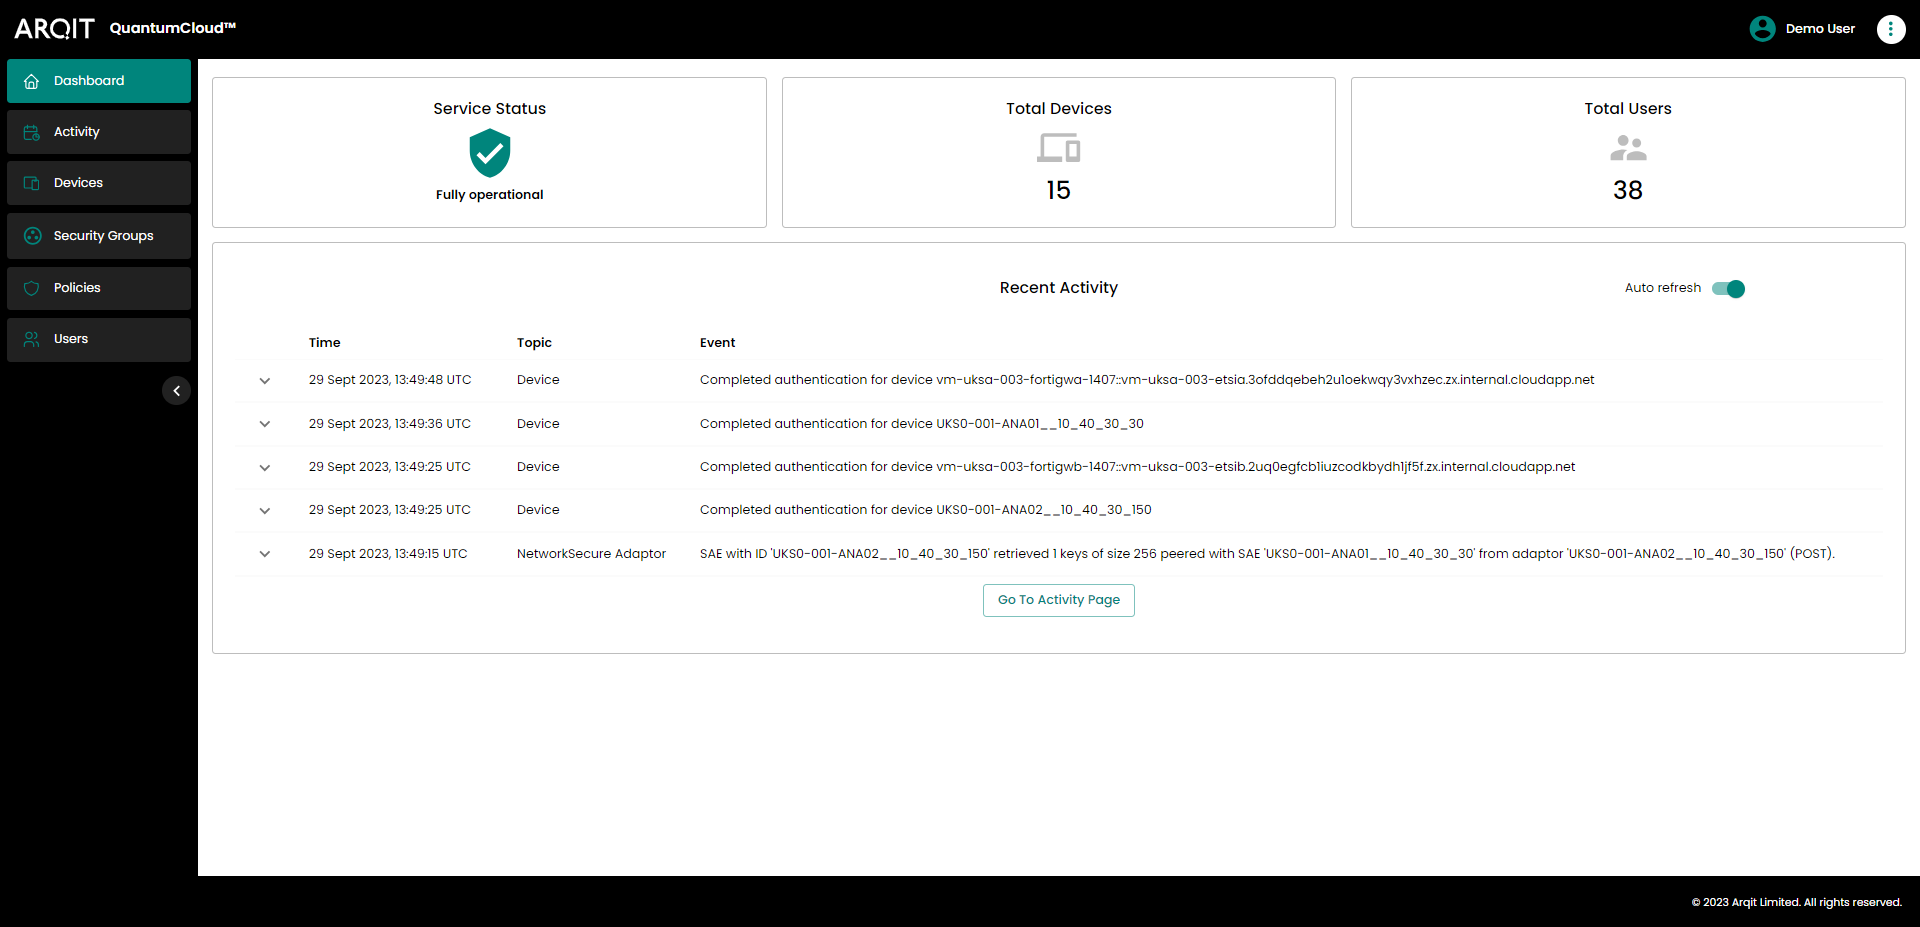
Dashboard view
Viewing Activity
Selecting “Activity” in the left sidebar will bring up a paginated list of events relating to the tenant.
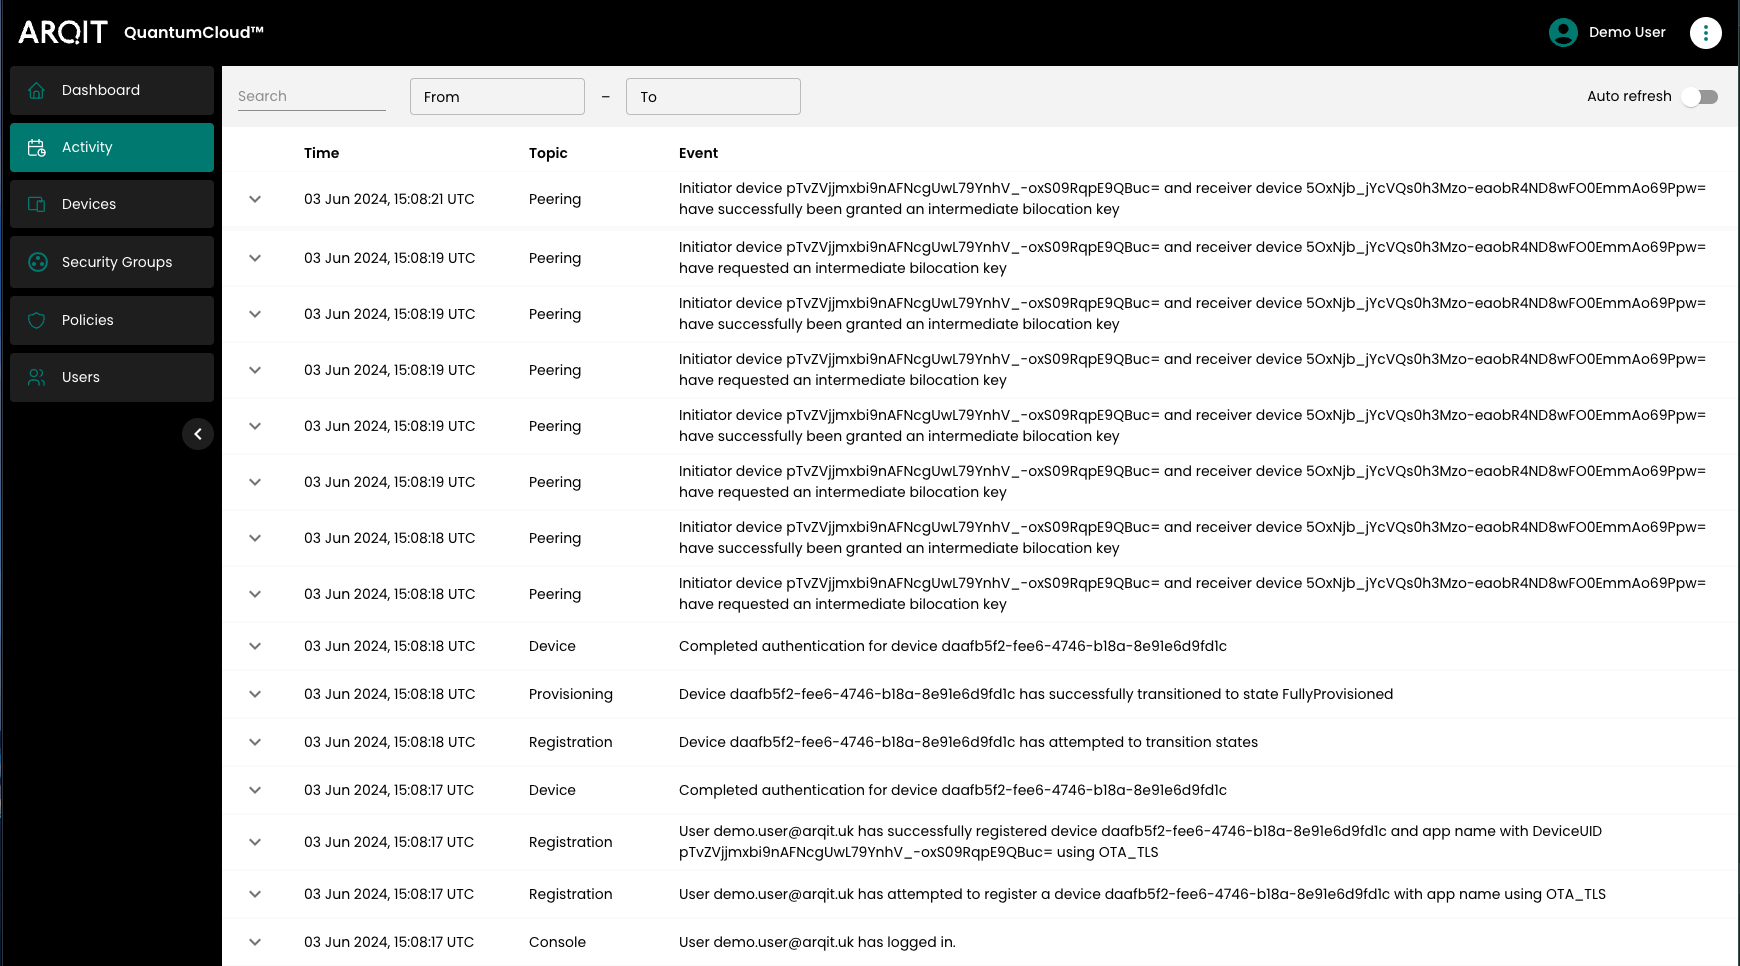
Activity page
The page will auto refresh by default. This can be switched off using the switch at the top right of the page.
Activity events can be filtered to find events related to a specific string of text using the search box to the top left of the list. This allows searching for events related to specific devices, users, event topics, etc.. results can also be narrowed to within a time bracket by entering values in the ‘From’ and ‘To’ boxes next to the search box. This can be used independently, or in conjunction with the text search.
Managing Devices
Selecting “Devices” in the sidebar will bring you to the devices page. Here you can see information about all the registered devices on the platform with associated metadata.
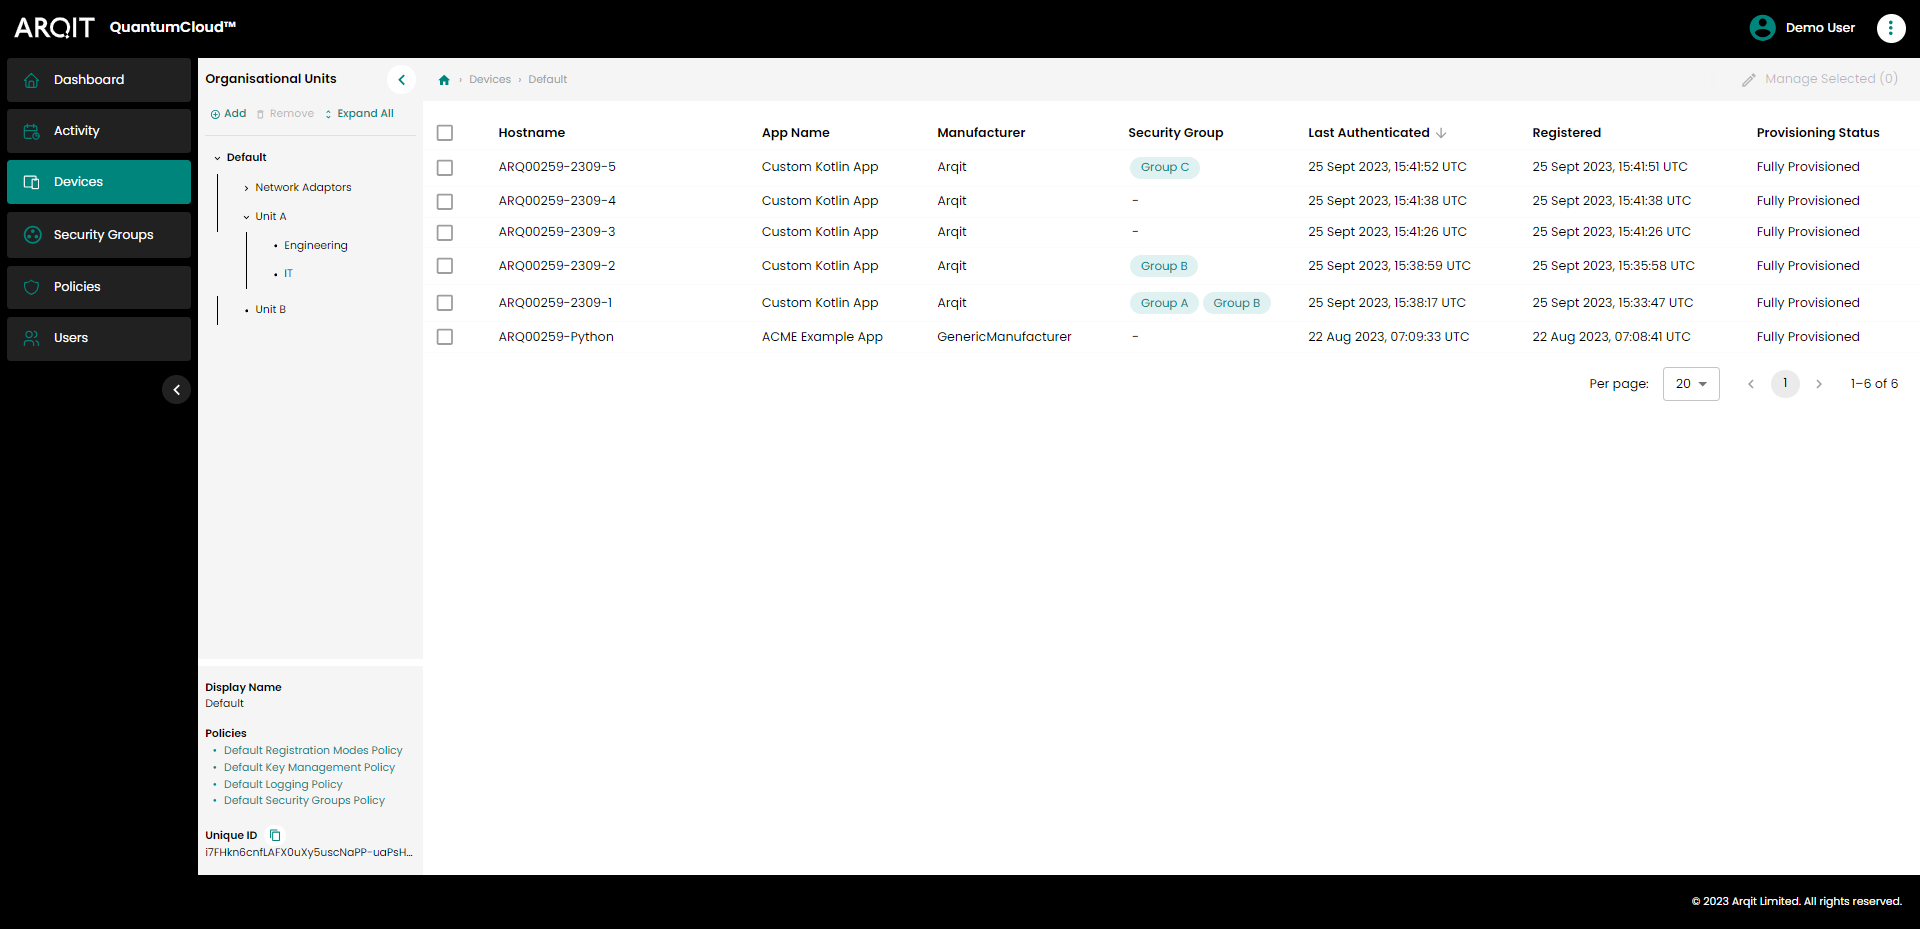
Devices Page
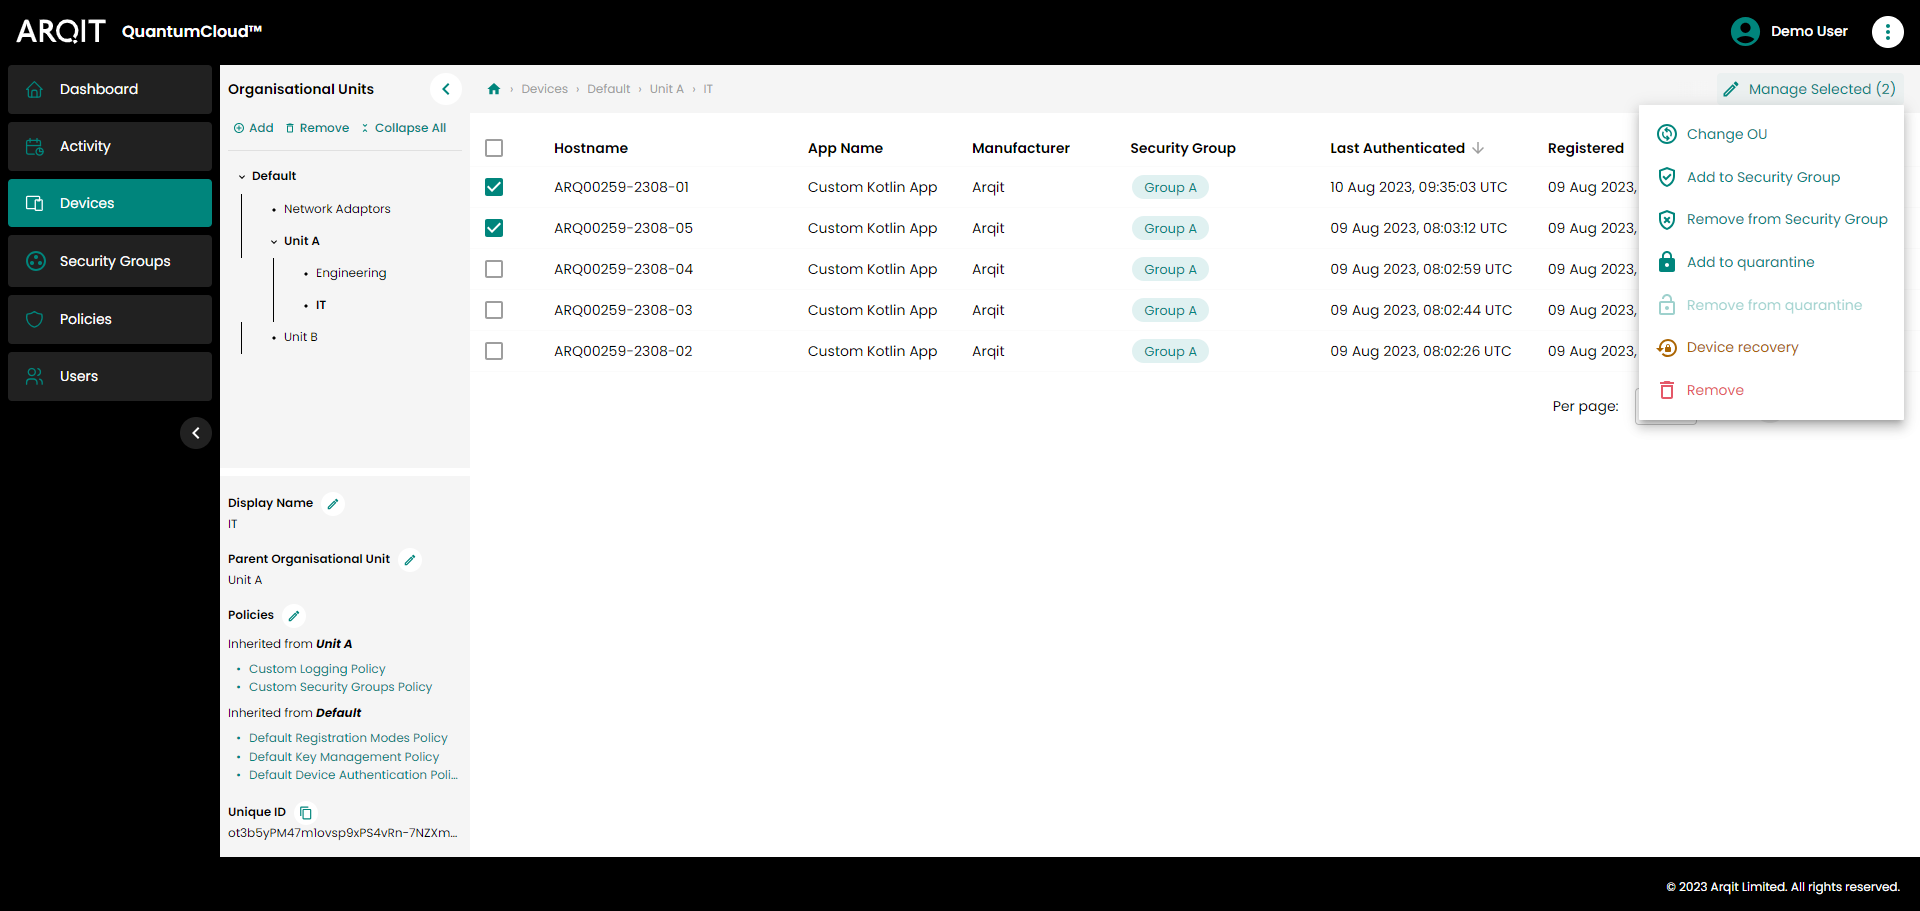
To edit devices, users can select devices in the list using the checkboxes on the left hand side of the list, before clicking the ‘Manage Selected’ button above the table to the right (at least one device must be selected for this button to be ‘active’). This will open a dropdown list of actions that can be carried out on the selected device(s).
Manage device actions
Manage device actions
Actions are:
Change OU - Change the Organisational Unit in which the selected device(s) sits.
Add to Security Group - Add to the list of Security Groups the selected device(s) is a member of (see Security Groups below).
Remove from Security Group - Remove the selected device(s) from specified Security Groups.
Add to quarantine - Quarantine the selected device(s). Quarantined devices are placed in a a new ‘Provisioning Status’ (‘Quarantined’) whereby they are prevented from negotiating any new keys with other devices.
Remove from quarantine - Remove the selected device(s) from quarantine. This will restore devices to their previous ‘Provisioning Status’ and key negotiating functionality will be restored.
Remove - Deregisters the selected device(s) and removes all record from the platform (activity records will be preserved). This function should only be used when a device is unable to deregister itself.
Device recovery - Returns the selected device(s) to the ‘Registered’ state. All device associations will be preserved. Applications built on the v24.04 SDK and beyond will automatically re-provision (check release notes of the application to see if this feature is supported.
Organisational Units
System administrators can organise their devices by grouping them into ‘Organisational Units’ (OUs). An OU is a hierarchical structure, akin to a file directory used for organising devices and other OUs.
The OU hierarchy can be viewed in a sidebar to the left of the ‘Devices’ page. This should be open by default when users log in and access this page, though it can be collapsed to expand the screen real estate, e.g. to view other device details.
System administrator users are able to create new OUs in the hierarchy and move devices between them using the buttons in the OU side panel.
All newly registering devices will be placed in the root/default OU and be subject to the policies applied to it (see policies, below), with the exception of Arqit NetworkSecure™ Adaptor devices, which will be placed in a newly created ‘Network Adaptor’ OU.
Policies
Application/device behaviour is governed by the policies applied to each device. Policies are inherited hierarchically, with precedent given to policies applied lower down the hierarchy in this order:
Directly applied to the device
Device’s Parent OU policy
Grandparent OU’s policy
etc.
If a Device has an instance of policy ‘Type A’ applied directly to it and its parent has a different instance of ‘Type A’, then the device would use its own Type A instance, as that is higher up the hierarchy.
Policies applied to OUs can be viewed and edited via the OU details panel, below the OU hierarchy.
Policies applied to a device can be viewed and edited via the ‘Device details’ panel to the right of the Device table. Users can also view whether each policy instance is directly applied or inherited by membership of an OU.
For information about creating and managing policy instances, see Managing Policies section below.
Device details
Selecting any device in the Device page view opens the ‘Device details’ side panel on the right the screen. This panel displays the details of the device as follows:
Application ‘Heartbeat’/activity status
Arqit NetworkSecure™ devices are able to send a periodic ‘heartbeat’ message to the platform, allowing the activity status of the application can be inferred and viewed in the ‘Device details’ panel on the console.
By default, device status will show as follows:
Green/Active - a heartbeat message has been received in the 5 minutes* prior to page load
Amber/Recently active - a heartbeat message has been received between 5-10 minutes* prior to page load
Red/Inactive - no heartbeat message has been received for more than 10 minutes* prior to page load
Grey/Unknown - no heartbeat message has ever been received for this device
A tooltip showing the time stamp of the last received heartbeat message will display when hovering over the status icon.
*These time values are the default settings applied when the tenancy is first created. The boundaries can be customised (see expanding section ‘Customising Heartbeat status boundaries’ below).
Organisational Unit
The details of the organisational Unit the device sits in.
Device policies
The various policies applied to the device, including from where they are inherited (directly applied or by membership of an OU).
Device properties
Arqit NetworkSecure™ devices are able to scrape information about their environment, add it to any other relevant information and send it to the platform server, allowing these properties to be viewed in the ‘Device details’ panel on the console.
Note this feature has only been incorporated into the Arqit NetworkSecure™ adaptor (v1.1 and later) at this stage and is not yet available for consumption by other applications. There will be no properties section of the ‘Device details’ panel for all other applications (or for Arqit NetworkSecure™ adaptors which have never sent a properties message).
Security Groups
Security Group functionality [optionally] restricts devices ability to negotiate keys with one another. When enabled, devices must be members of at least one mutual Security Group in order to negotiate keys with one another. This allows system administrators to actively restrict key-forming within a tenant (Allow/Deny), if they so wish.
Security group enforcement is switched off by default for the tenant (all devices can peer with all others). It can be switched on by navigating to the policies page, clicking the edit icon for the ‘Default Security Groups Policy’ and changing the setting. Security Groups can be created, edited and deleted by navigating to the ‘Security Groups’ page using the left-hand navigation.
Devices can be assigned and removed from Security Groups by navigating to the ‘Devices’ page, selecting required device(s), selecting from the ‘Manage Selected’ above the devices table to the right.
For information on managing the Security Groups in which devices can sit, see Managing Security Groups section below.
Managing Security Groups
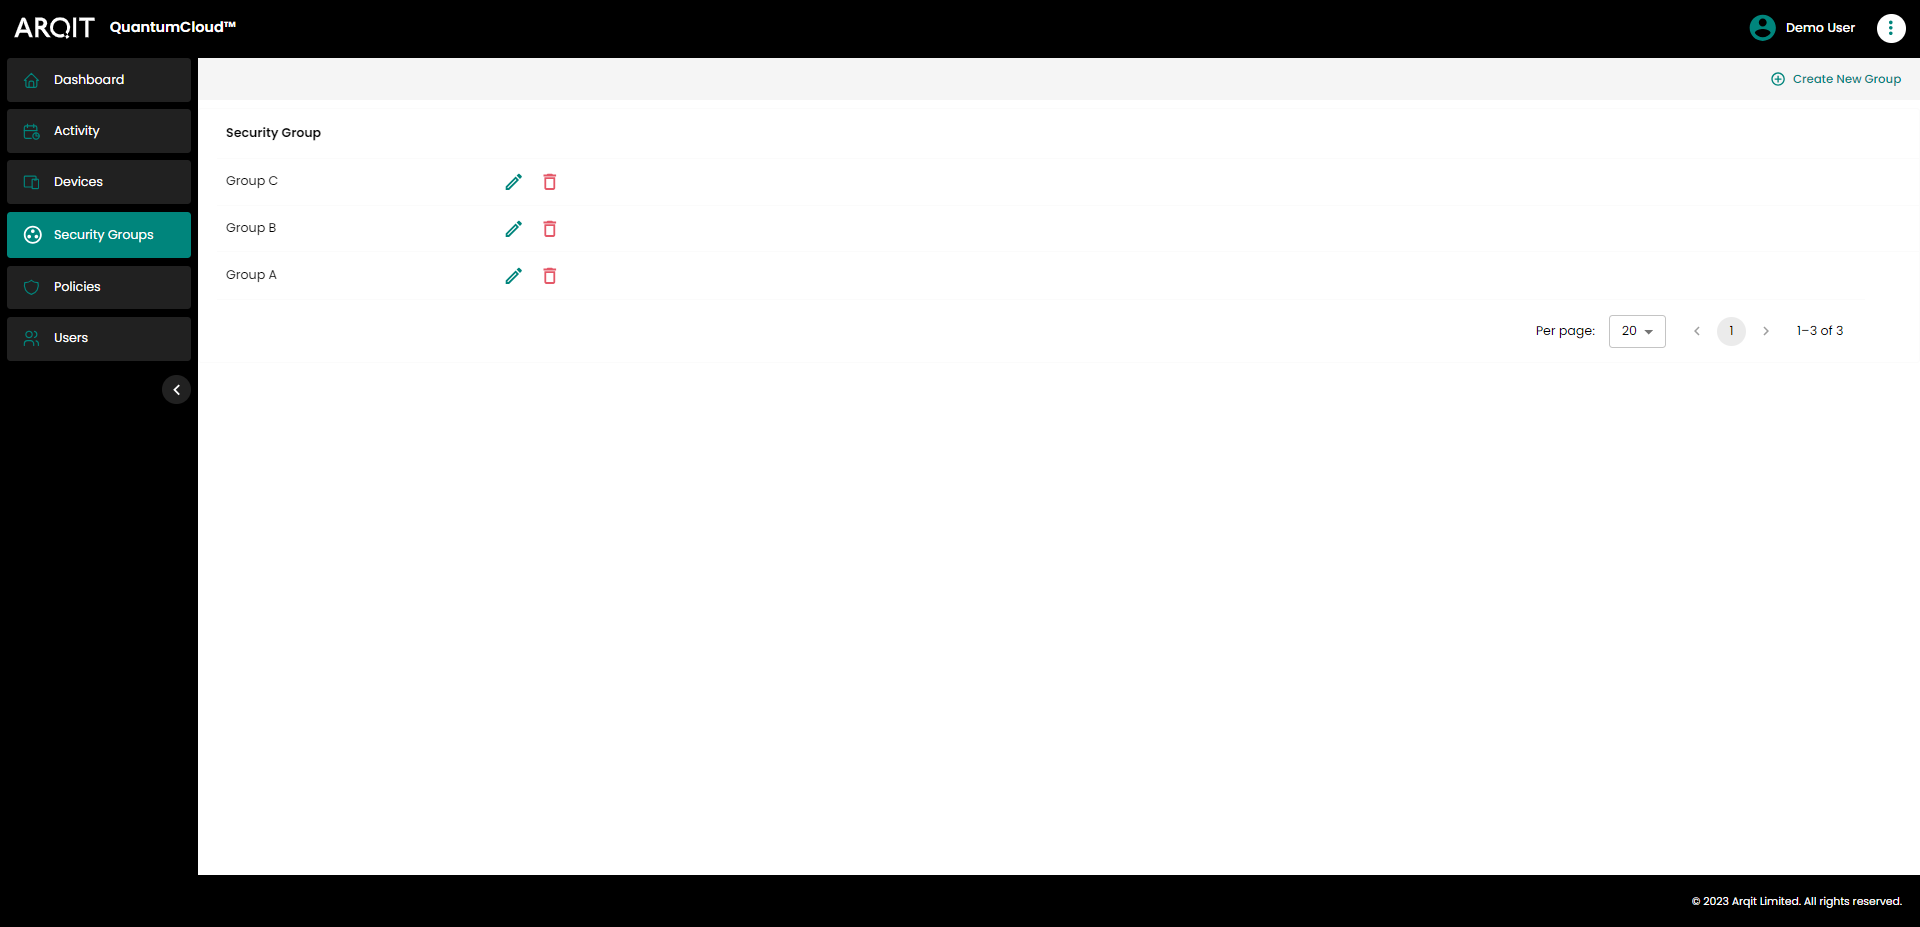
Selecting Security Groups in the left sidebar will bring you to the security groups page. Here, you can see the list of security groups currently available.
Security Groups page
Security group display names can be changed. To do so, click the pen icon and fill in the new details in the modal, before clicking the ‘Update’ button to confirm the change.
Security groups can be deleted by clicking the trash icon alongside the desired security group and clicking ‘Remove’ in the confirmation modal.
To create a new security group, click ‘Create New Group’ button above the security group list to the right.
Managing Policies
Selecting “Policies” in the left sidebar will bring you to the policies page. Here, you can see Attributes about each policy in a tabular list. You can also edit details, clone and delete policies by using the icons in the ‘Action’ column. You cannot directly create new policy instances, you must clone an existing instance of a policy type, edit it and apply it to the desired Organisational Unit or Device (see Managing Devices section above).
For details on the types of settings in each policy type, see table below:
Policy | Settings |
|---|---|
Device Authentication policy | Length of devices' authentication session. |
Device Behaviour policy | Frequency with which devices will poll for updates to policy settings. |
Device Monitoring Policy | Boundaries for by which devices' ‘Activity status’ is calculated. |
Key Management policy | Peering mode: Sockets (including port and whether TLS should be used); or MQTT (including MQTT server details). Whether P2P keys may be used by devices. Key expiry time for Bilocation Keys and P2P keys. |
Logging policy | Logging level Log location: Local logging (including log retention period); or Syslog Forwarding (including settings for Syslog server) |
Registration Modes policy | The modes by which devices can register to the tenant/OU. |
Security Groups Policy | Whether devices are restricted in key negotiation between all devices in the tenant or just those with a common security group. |
Managing Users
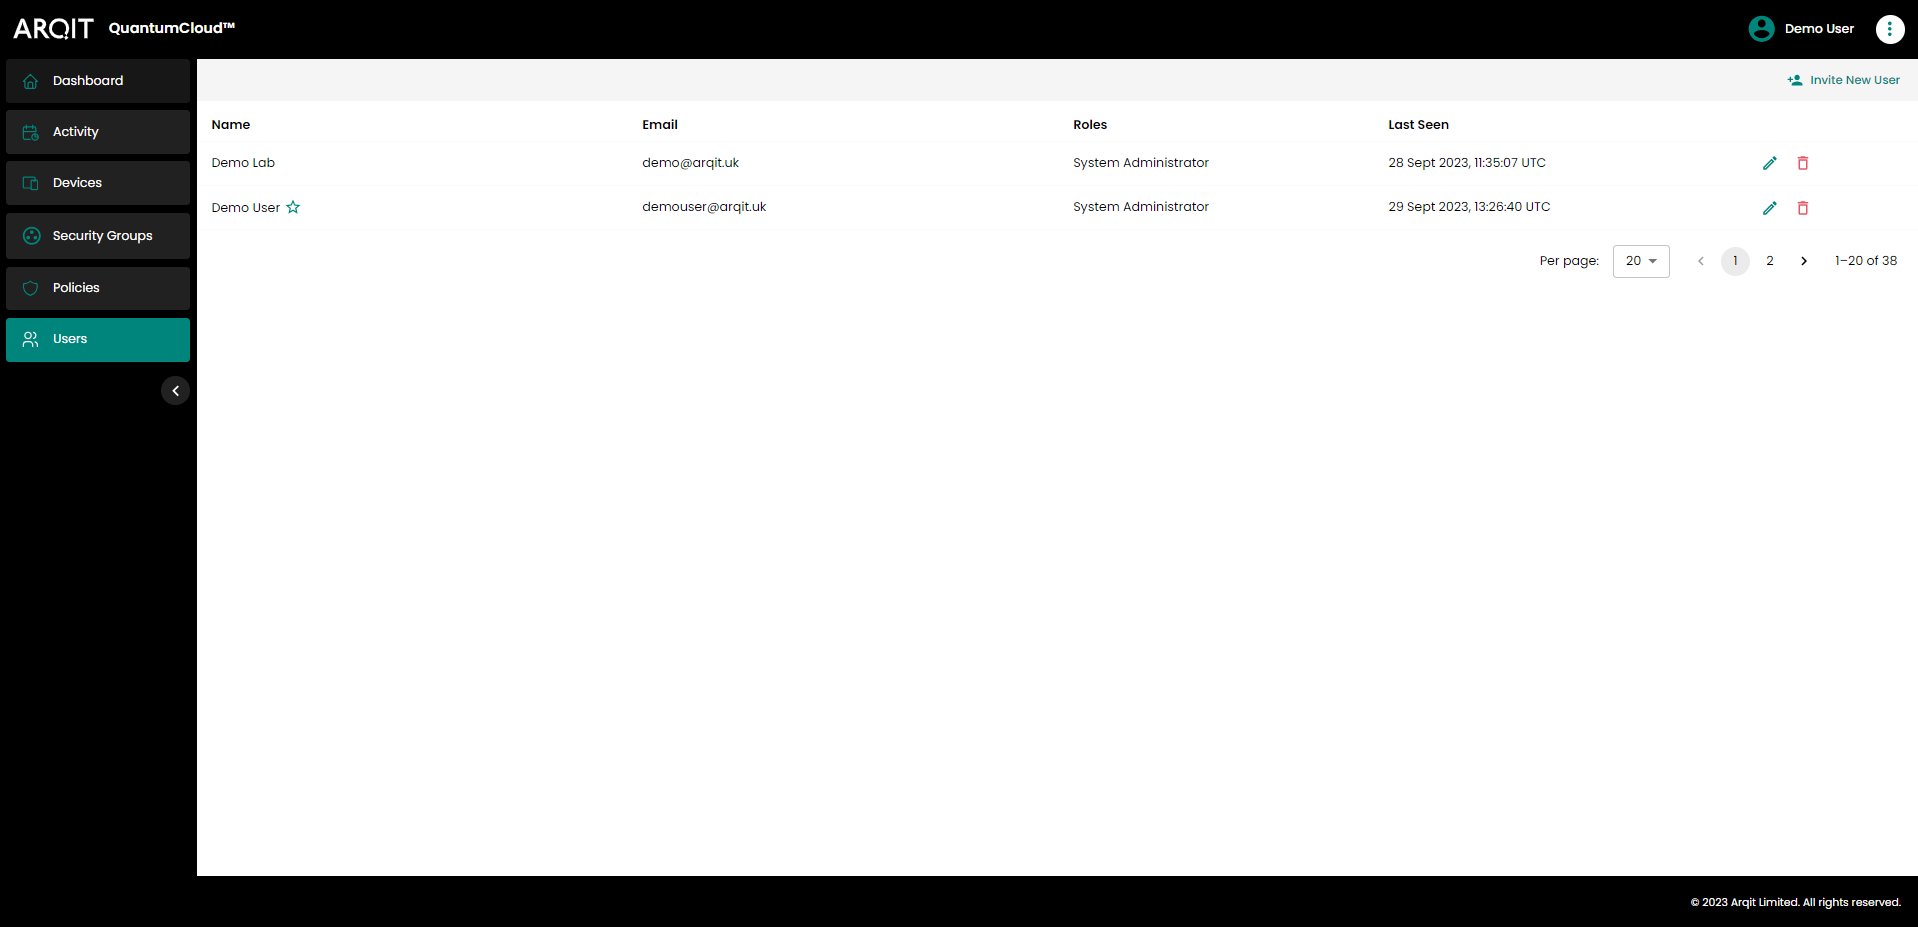
Selecting “Users” in the left sidebar will bring you to the user management page. Here you can review the list of users with access to the console, add or edit users’ details and delete those you no longer wish to have access.
Users page
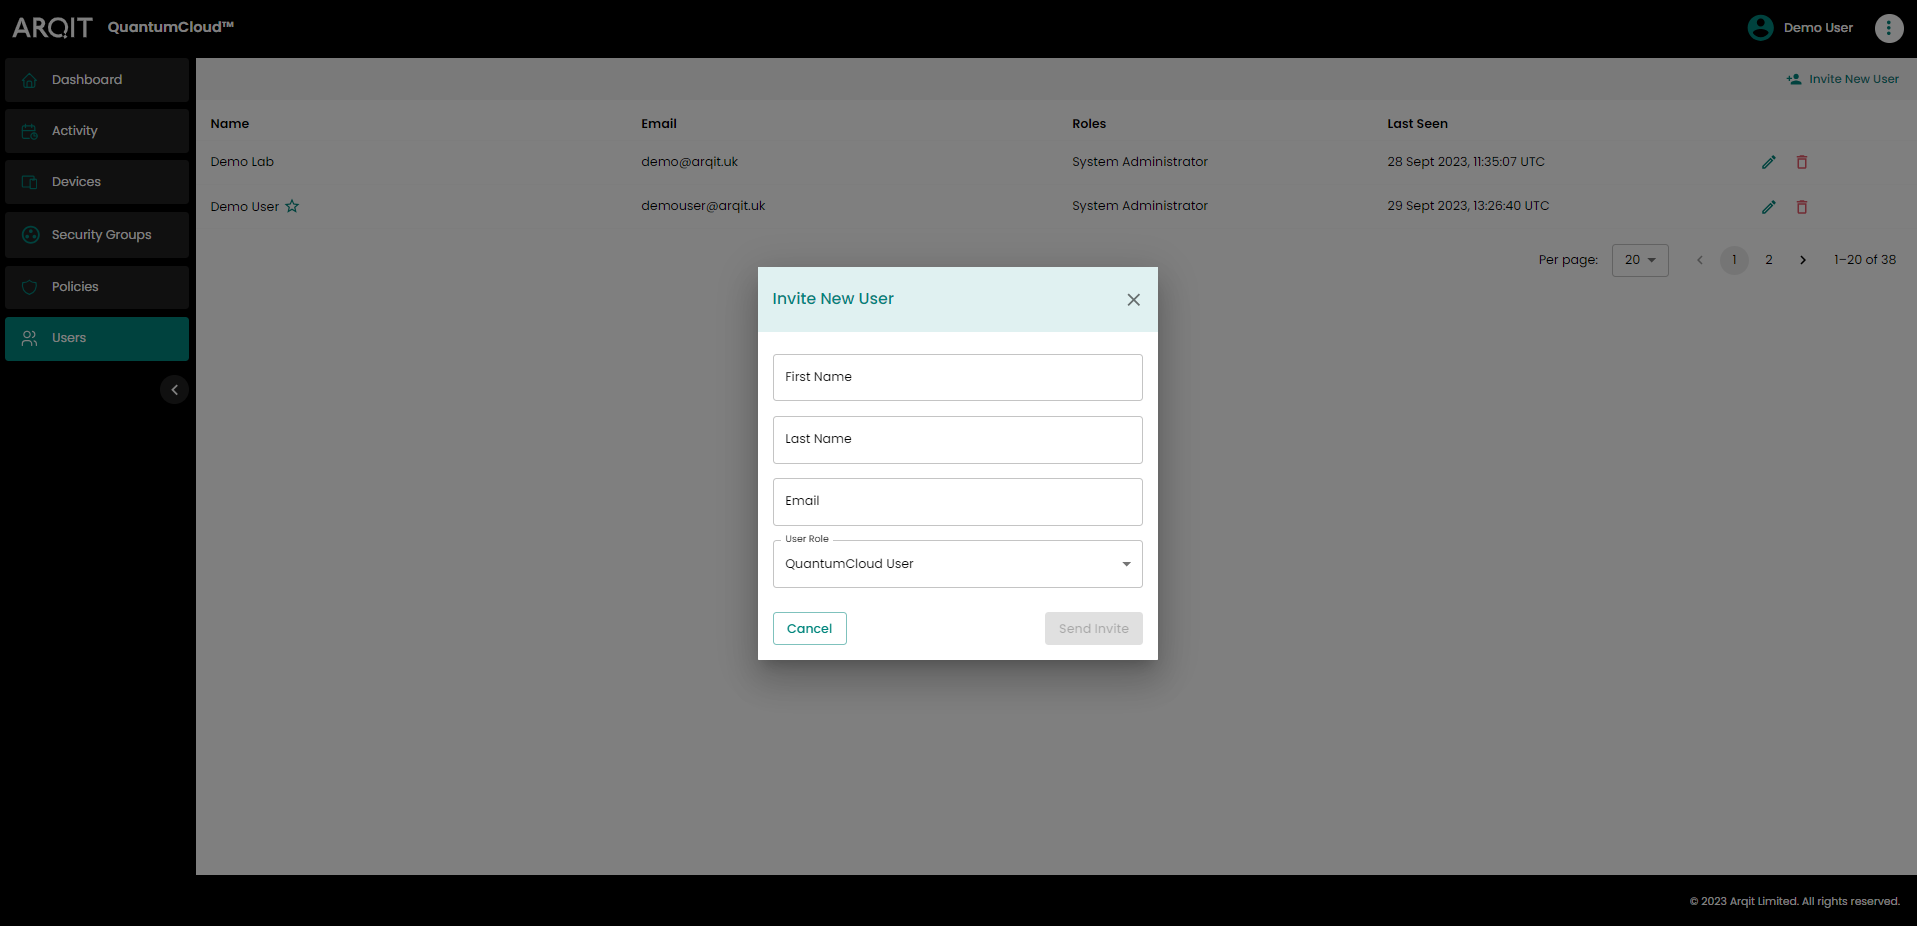
To invite a new user, click “Invite new user” using the button top right of the page, fill out the user details and select the desired role.
Invite new user modal
There are 4 roles available as follows:
QuantumCloud User – view only user (has view only-access to all pages and no edit rights);
Commissioning Engineer intended for those users commissioning devices onto a network and checking devices are correctly registered, but where such users are not required to modify policies or hierarchy in which a device sits (as ‘QuantumCloud User’, but can also register and de-register devices);
SDK user – intended for application developers to have full functionality in test environments or environments where programming and requirements are highly fluid (as ‘Commissioning Engineer’, with additional rights to create and edit Organisational Units (see below), Policies and associated linking rights); and
System administrator – users with all rights to the customers’ tenant (as SDK user, with user administrative rights (change roles, edit user details)).
Contact information
If you encounter any issues using the console please contact support@arqit.uk.